FOSS Fixins: Editing photos with Darktable, Affinity Photo, and Google Nik Collection
![]() This week I started learning about all the wonderful open-source tools available for photography. Previously, I’ve stumbled through making selects in Adobe Bridge or Lightroom. At work, I am working more and more with photographers and I’m looking for open-source tools that free me from having to buy multiple seats for the entire company to access software. Darktable seems to be a great solution.
This week I started learning about all the wonderful open-source tools available for photography. Previously, I’ve stumbled through making selects in Adobe Bridge or Lightroom. At work, I am working more and more with photographers and I’m looking for open-source tools that free me from having to buy multiple seats for the entire company to access software. Darktable seems to be a great solution.
It all starts with a shoot
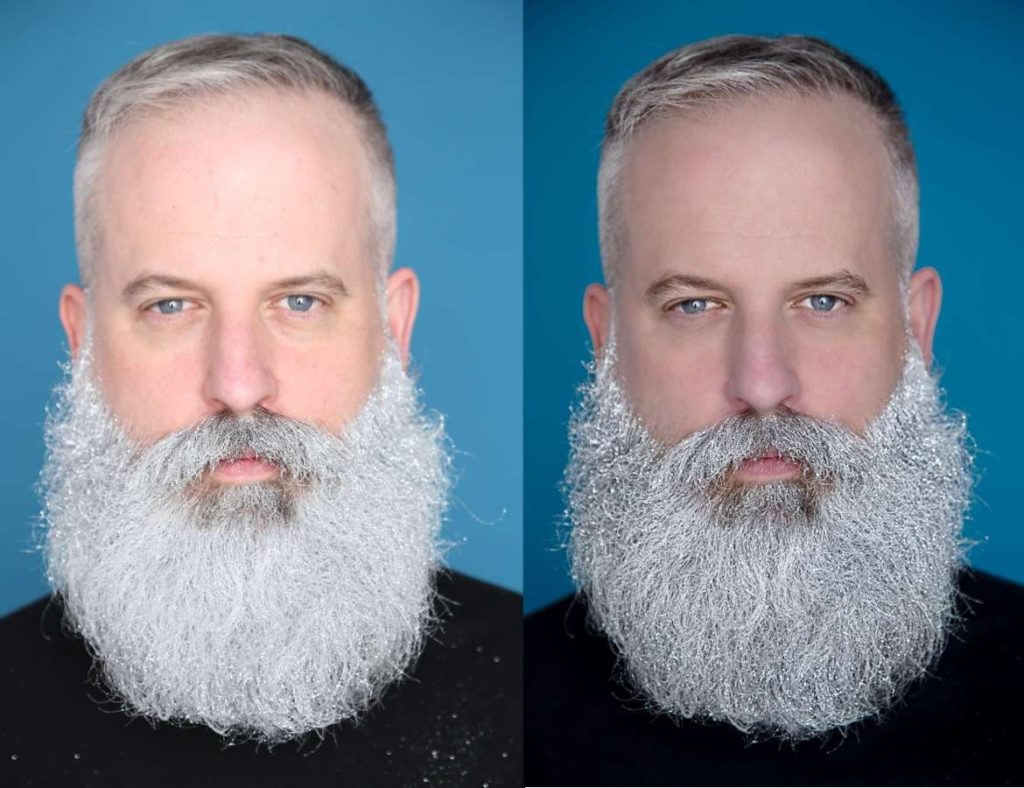
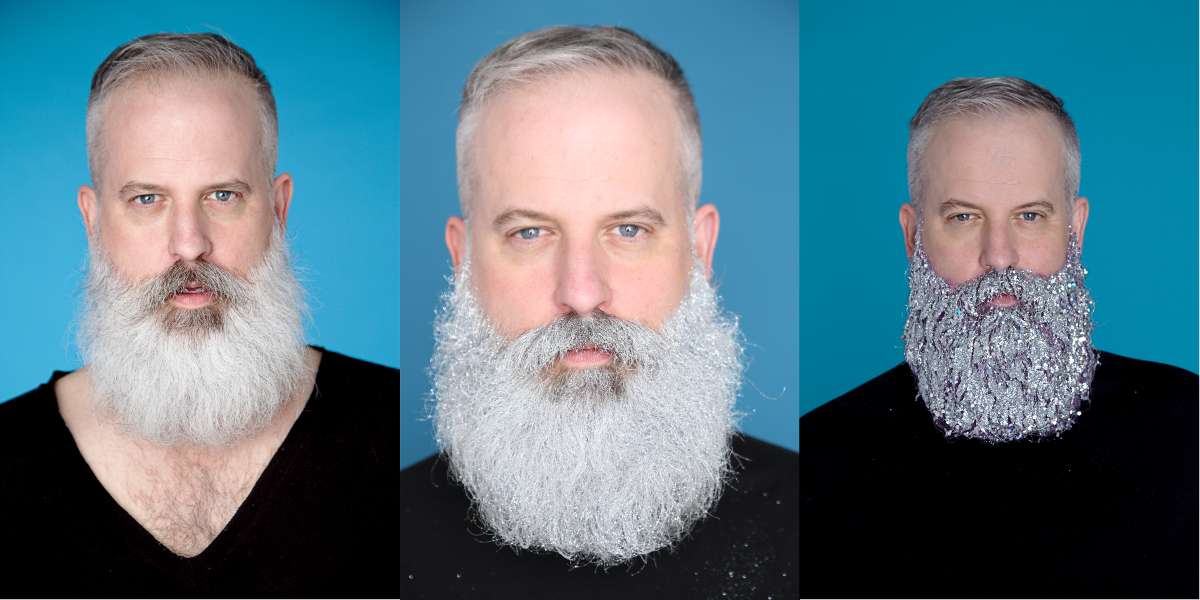
For the Holidays my long-time photography friend and fellow MICA alum, E. Brady Robinson, wanted to get me into her studio and memorialize my Santa beard for Christmas. One of my coworkers suggested creating a glitter beard. I never heard of this phenomenon. Turns out—for fun or just wanting more sparkle—grown men decorate their beards with glitter. Researching glitter had me stumbling upon experts like The Gay Beards.

The week before the shoot, I watched a lot of videos of how to apply glitter. We tried different types of application to see what would read best. Personally, I liked the “dry” look best. It was the most subtle, but the beard was able to look its fullest. Using a “dry” look image would require more post work to emphasize the glitter.
Finding Solutions
Brady sent me on my way at the end of the shoot with a removable drive filled with images. She tasked me with making selects that she could edit.
At home I have both Linux and Apple laptops. For the past year, I have not used any Adobe products at home, using alternate solutions intead. I wasn’t sure what other photo software solutions were out there other than Adobe products for photography.
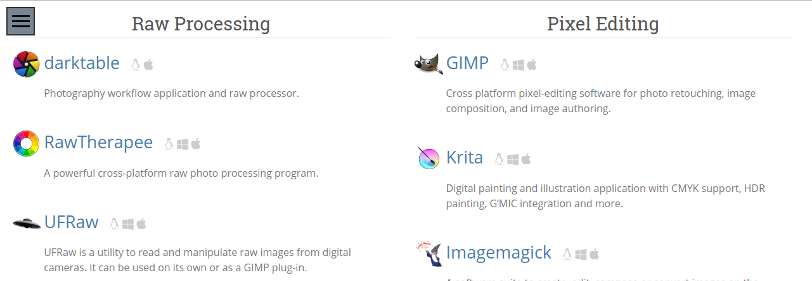
I started researching options online and found two programs, Darktable and RawTherapee. Both came highly recommended online from users. On Google+, I posed the question, ‘Which program is better?’ My friend, Americo Gobbo, pointed my to an amazing site for open-source photography called pixls.us. The site’s filled with great open-source resources for photography enthusiasts, including tutorials, a forum and a comprehensive list of available software.

Selecting Darktable and Darktable selects
I downloaded both Darktable and RawTherapee to try out. Darktable felt more familiar to me than RawTherapee. Many people online said that the interface for Darktable was dense and overwhelming, but I thought it was pretty straight forward and easy to use. The program has different tools in different workspaces and I appreciate that the workspaces are labeled as words at the top of the program instead of learning yet more icons.
I like the fact that RawTherapee works on Linux, Mac and Windows. People in my office are split between Mac and Window machines. It would be a good solution for the office. For personal use though, I really liked the overall feel of Darktable.
If I was just to be making selects for a photographer, Darktable’s interface wins for me hands down. I was able to breeze though thousands of images to narrow down my final selects for Brady. I sent off the numbers that I thought were best.

Darktable workflow
Reading up about the software made me curious about trying it out for editing. In my travels, I found a great workflow tutorial by David LaCivita. At first I didn’t watch the video because it was an hour long and instead gravitated towards shorter videos that covered singular topics. Once I got some time, I started to watch David’s video and I’m so glad that I did. He walks through his entire process, from importing images to exporting you final work.
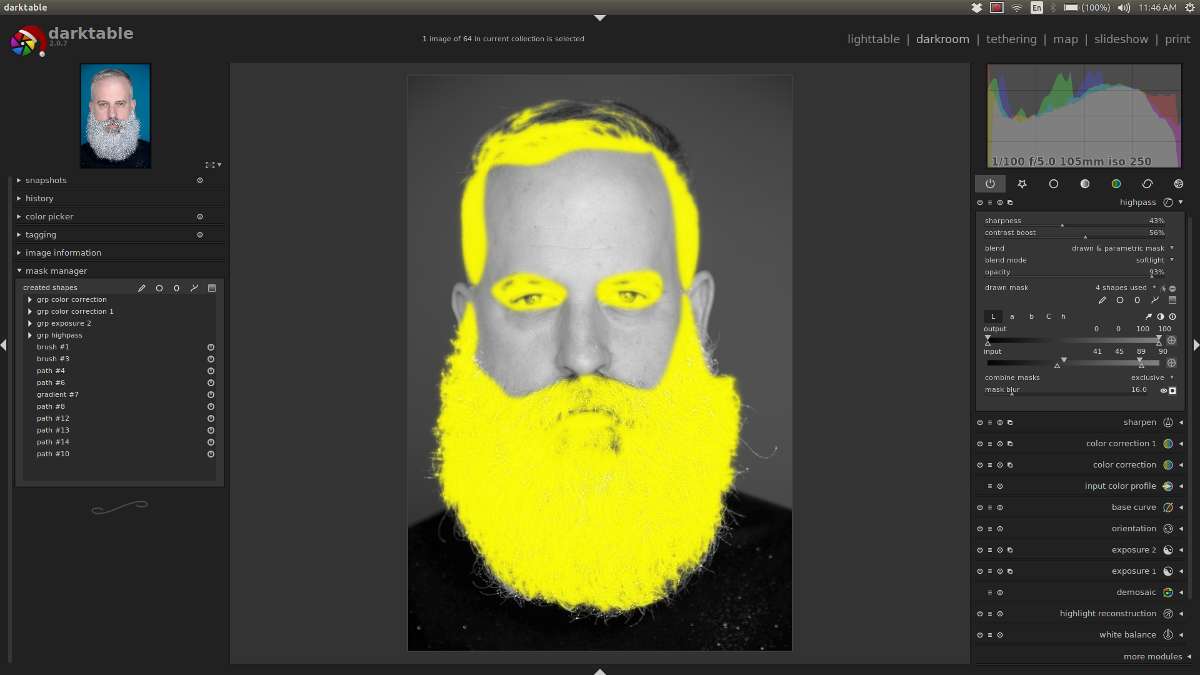
What blew my mind was the masking capability of the program. David shows how you can refine masks using a combination of luminosity, hue, and drawn masks. I only wish this was possible in photo editing software like Photoshop. Maybe I’ve lived under a rock for decades, but I’ve never seen anything like it. Even though Brady was going to make the final edits on the photos, watching David’s video made me want to take a stab at it myself.
Just like Photoshop or other programs out there. Darktable requires a certain level of alchemy and it takes time to learn what bells and whistles to ring and toot to sweeten your image. Practice makes perfect, but with time, I can really see creating standards that can be applied to an entire set of images.
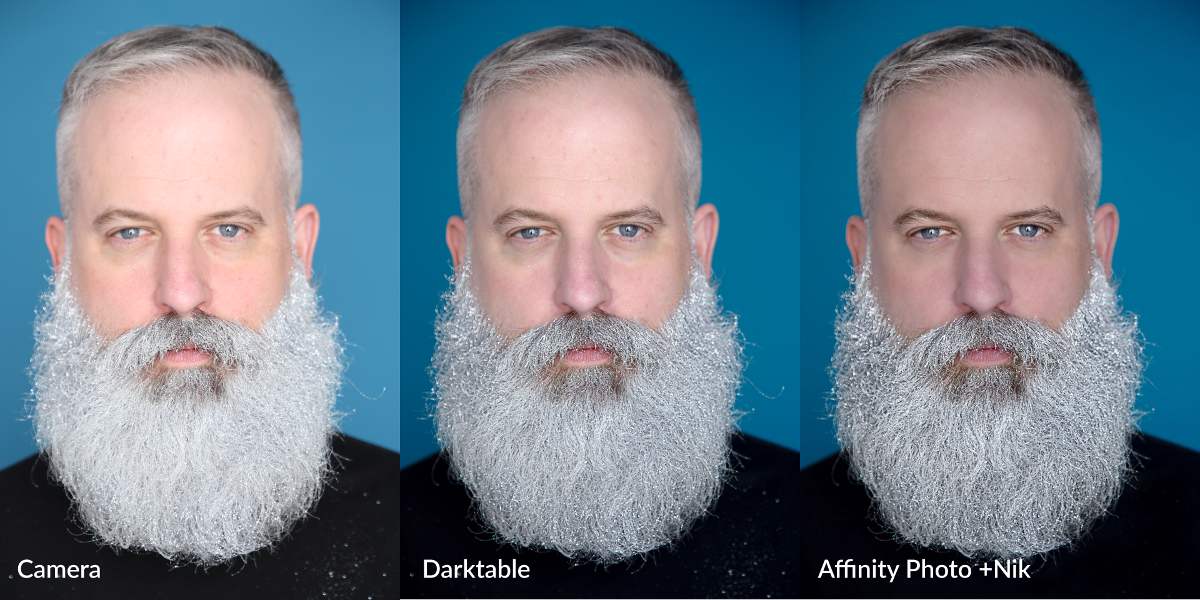
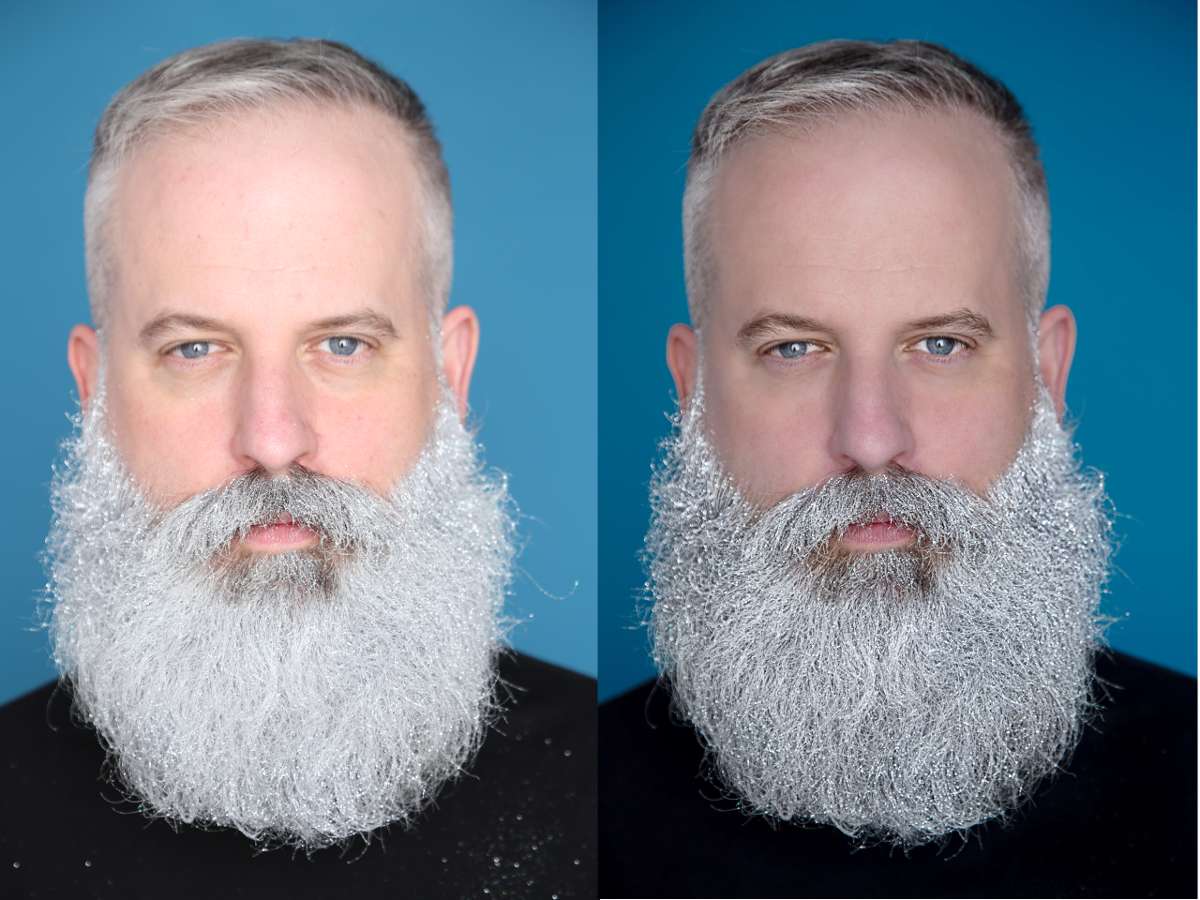
Final touches with Affinity Photo and Google Nik Collection
With Darktable, I was able to adjust the details in the beard and make the image overall less soft. I also brought a little color back to the skin tones and adjust the tonal values. I darkened the background to make enhance the beard.

For fine tuning and effects, I decided to use Affinity Photo. Now I know you’re going to say that Affinity Photo is not open source. It’s not, and I could have done the editing work in Gimp. There are two reasons why I chose Affinity.
First, Google Nik Collection plugins work with Affinity Photo. I was introduced to the Nik Collection when I was on a photoshoot. I saw how easy it was for the photo assistant to make an approximate final image while we were on set using the Nik plugins. Since then, Google acquired the Nik Collection and eventually made the plugins free and available to everyone. These plugins work both in Photoshop as well as Affinity Photo. If you use either program, I would highly recommend downloading the plugins and trying them out.

The second reason is that I want to learn more about the Affinity products. A couple of months ago, Affinity sent me a book to review for their other program, Affinity Designer. Designer is vector illustration software that’s comparable to Inkscape or Illustrator. I read the Designer Workbook and created a design of my own with some of the tricks that I learned in the book. I found that the software was unbelievably impressive and something that shouldn’t be compared to other vector programs on the market. It’s truly it’s own animal and has the ability for artists to switch freely between vector and raster within the same program effortlessly. I haven’t seen anything like it since QFX in the 90s. For those of us that are geeky enough to have used QFX, you may recall how unintuitive it was to shift between vector and raster. Twenty years later, Affinity cracks the code and makes an impressive user experience. The major downside to Affinity software is that it only runs on Mac and Windows and they have no interest in making their programs available on Linux.
I’ve resigned to the fact that I will be traveling between Linux and Mac to get work done. And although I prefer Free and Open Source Software (FOSS), I am not a purist and will bring paid software into my workflow. I know that some FOSS supporters rail against any paid software and that’s okay. But please remember, NO software is FREE. Every piece of software I use, I try to support in some way. I also pay for any software that I use professionally. If you want to keep your favorite FOSS software relevant, please feed a developer. (Okay, off the soapbox and back to the task at hand.)
In Affinity Photo, I removed skin defects with the Blemish tool, adjusted the skin to make it more even with a Hue/Sat adjustment layer, and evened out the bumpy texture on the left side of my forehead. I used the Bleach Bypass effect from the Nik Collection to make the beard, hair, and eyes pop even more. I wanted the end result to look a little unreal and overworked.
Final thoughts
Using Darktable was a blast and I’m looking forward to using it more. With practice and more tutorials, I know that I will be relying on Darktable. My hope is that I will be able to eventually be comfortable doing almost all of my work in Darktable.
I can’t thank the Darktable developers enough for making such a great program! Special thanks goes out to E Brady Robinson for her wonderful photography and David LaCivita for sharing his Darktable workflow. And of course, I can’t forget Pixls and their robust site dedicated to aspiring and established photographers. I’m looking forward to reading more of their online tutorials while I’m on vacation this Holiday season.
And for anyone interest in trying Affinity Photo, Serif is having a sale and you can pick up their Photo for just $39.99. It’s more than worth it!

Nice write up, I will give Dark tble a try. I won’t touch Affinity though as I only want to use Linux.
By the way, in your first paragraph you say
“Previously, I’ve stumbled through making selects in Adobe Bridge or Lightroom.”
It’s unclear what you mean, I think you mean selections.
Also I don’t know what this means
” I’m looking for open-source tools that free me from having to buy multiple seats for the entire company to access software.”
What do you mean by “multiple seats”?
Hi Elwoode! Glad that you like the post! Definitely give Darktable a try! I only wish Affinity was available on Linux. I have the same problem you have. I would love to use Affinity Designer and Photo, but I hate to have to jump over to a Mac in order to do it. I would love to stay in my Linux environment for everything and I’d definitely pay for the software if it were on Linux. It’s that good.
“Selects” does refer to “selections”. It’s a term that’s used by photographers. “Multiple seats” is a licensing term. A seat is an individual license. If I have ten employees, I’m paying for 10 seats. I could have just as easily said “multiple licenses.”
Thanks again for writing. In the near future I’m hoping to write about DigiKam. Best! Stephen 🙂