Notes for Cut-Out Animation Step-by-Step
I actually found these notes I created in 2010 for creating a cut-out character taken from the tutorial on the Synfig site. I’ll read and try my notes first and see if they actually work:)
Here are the notes that I made. If I need to add to them, I will. I’ll be taking more notes as I read other tutorials/documentation.
Let’s start by adding a Rotate Layer to the hip
- Go to the hip paste canvas and select the hip image layer. Insert a new Rotate layer (File->Layer->New Layer->Transform->Rotate) just above the hip image layer.
- Rename the layer to ‘Rotate hip’.
- Go to the Rotate Layer parameters dialog and select the Amount parameter. This parameter governs the angle of rotation. Export that parameter (right click) and give a proper name (hip).
- Set up the rotation layer.
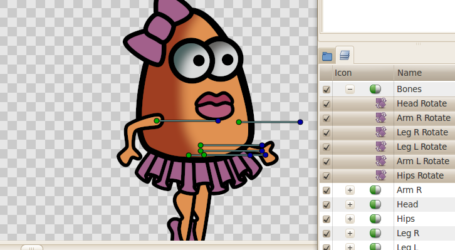
- You should have noticed that there is a Origin parameter in the Rotation Layer, this is the origin of the rotation. It is very important that you set the origin to the proper position, allowing proper rotation of the image layers, so in this case you need to place the origin of rotation at the center of the character’s hips. As another portent example, arms will rotate about the shoulder and not about the hand.
- The head needs to rotate the with the torso and additionally with the hip. Another way to put this would be that each limb bares it’s own rotation, plus the rotations of those limbs higher up the limb hierachy. To effect this, you should add the same rotation layer to all the limbs that depend on the hip rotation. Copy and paste the Rotate hip layer to all the encapsulated image layers. Remember that the rotation parameter is exported, and so will the value shared between all the pasted rotation layers, giving our desired effect. All the limbs will now rotate in congruently with the hip.
- Since the arms and the head are children limbs of the body they should suffer the same rotation as the body. Repeat the same for the body rotation layer and copy it over the arms and the head image layers.