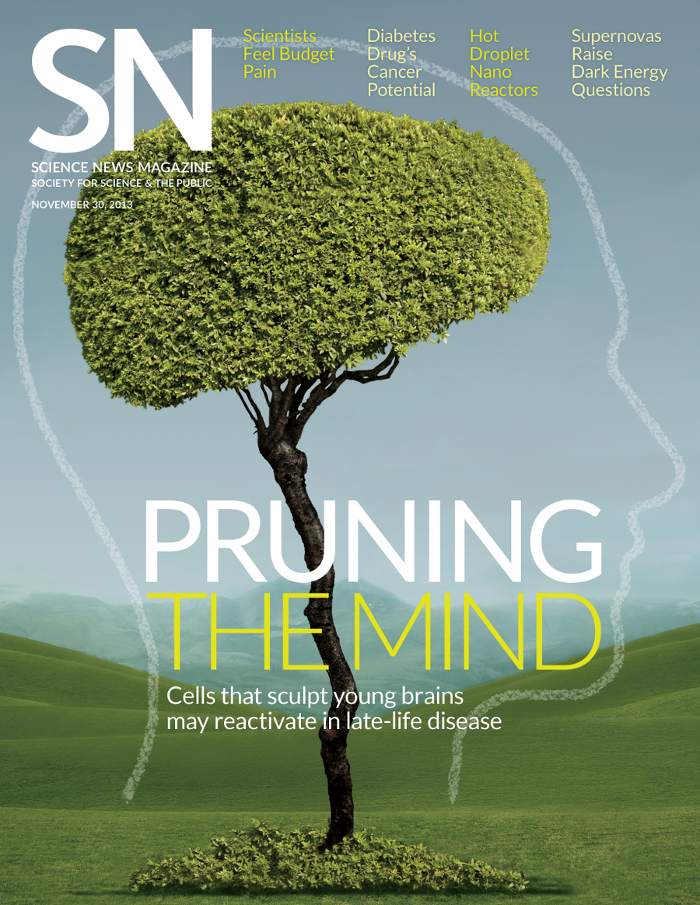
Recently I was given the task of creating a conceptual representation of microglia. Microglia are like little obsessive cleaners and guardians in your brain. They tidy up unwanted connections. Researchers discovered that as you get older, microglia’s cleaning may be destructive, leading to conditions like Alzheimer’s. So I guess there’s a dark side to cleanliness.
The idea
The editor assigned to the story likened the affects on the brain to over-trimming a bonsai tree. I thought her explanation would lend to a great visual for the story and possibly the cover.
Whenever I look for visuals on stock-photo sites to use for composites, I’m for some reason always surprised when I can’t find exactly what I’m looking for. You know, the perfect image, like a bonsai shaped perfectly like a brain. After a few hours of searching and many possibilities exhausted, I found a really great solution. The photo reminded me stylistically of a Target ad. It had most of what I wanted. I only had to add some elements.

I put a rough sketch together with the man trimming the bonsai tree-shaped brain. I removed the money sign shrubs and substituted a bonsai-type tree. My boss liked the idea, but we decided that the guy looked a little too corny. We really liked the symmetry of the background. What’s left without of the image though once you remove the gardener and his shrubs?
I decided to go back to searching for a similar landscape with a complete and unobstructed view. After spending some time sorting through pages and pages of landscapes, I decided to bite the bullet and begin photoshoping.
Cleaning the grass
Cleaning the background took a while to finish. In Photoshop, I cloned areas with the stamp tool to quickly remove the shrubs and the gardener. If you’ve used the stamp tool, you know that the soft brush gives you well blended but blurry-looking results.
When I’m finished with the stamp tool, I switched to the patch tool to bring the grass texture back to the soft-looking “stamped” areas. Usually the patch tool is a dream and corrects almost everything. Unfortunately, the pattern in the grass was difficult to mimic using the patch tool. Patched areas had too much contrast and began to look splotchy.
To clean the splotchiness, I selected untouched areas of grass with the lasso tool; feathered the selection from 20-50 pixels depending on the desired edge; copied & pasted the selection to a new layer; and moved that good looking blob of grass with over to the area that needed cleaning. I kept repeating this until I got the results that I wanted. A trick to refine the grass even more is it to add a mask to your blobby grass layers and paint on the mask to expose some of the ground that’s hidden underneath.

A mountain, a tree and a head
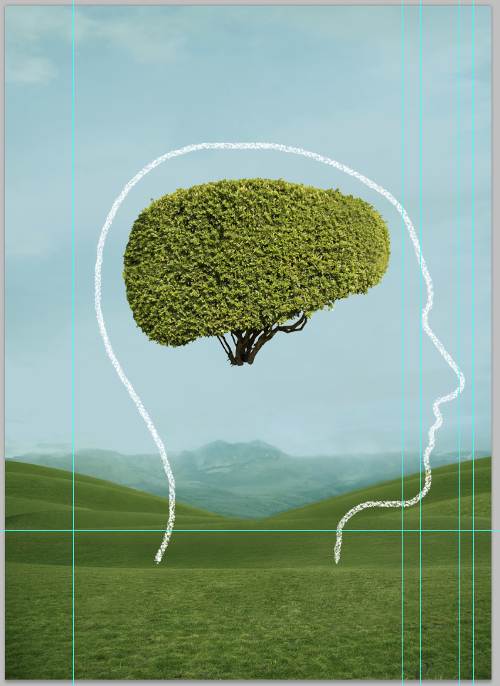
After cleaning the background, I still had part of the mountains that needed help. I found a great photo on Flickr that matched the mountains in the original image. Grafting the mountains together was pretty easy. I also had to mask a the leafy green of a tree and a chalk outline of a face adding them to my composition. I created the brain shape out of the original shrub shape using the liquify tools.


Adding the trunk and fallen leaves
Next, I added the trunk to the composite from yet another image and used a series of masks to blend the bark together. To separate the tree trunk from the background and make it stand out, I darkened it with adjustment layers. For the leaves on the ground, I used parts of the leafy shrub and painstakingly masked it out by hand-painted around the edges of the leaves. I brought back some of the shadow that was in my original image to make it feel like the leaves are resting on the ground.


Final results
It’s kind of crazy that after all this hard work, the final image looks pretty simple. It’s neat to reveal the process and share how I put ideas and imagery together. If you have any questions, please send them my way.

