Synfig: Library How-To
Working with libraries
Understanding libraries was pretty easy so far thanks to Ricardo Graça and Quadro Chave. I can’t thank them enough for everything they’ve posted with regards to Synfig and creating libraries. Libraries are essential for creating cut-out characters. If you want to change facial expressions, mouth shapes or gestures, libraries can help you save and recall those variables easily.
I created a video that explains how to create elements in your library. Once I get my character down, I’ll share my experience creating a library of poses and features for her. I’m really excited to get closer to actually animating my first complex character in Synfig. Along with the video below, I’ve also included a written step-by-step on the process. Please let me know if you have any questions. I’m just learning myself, but I would be more than happy to help other people with this wonderful animation tool!
Written step-by-step
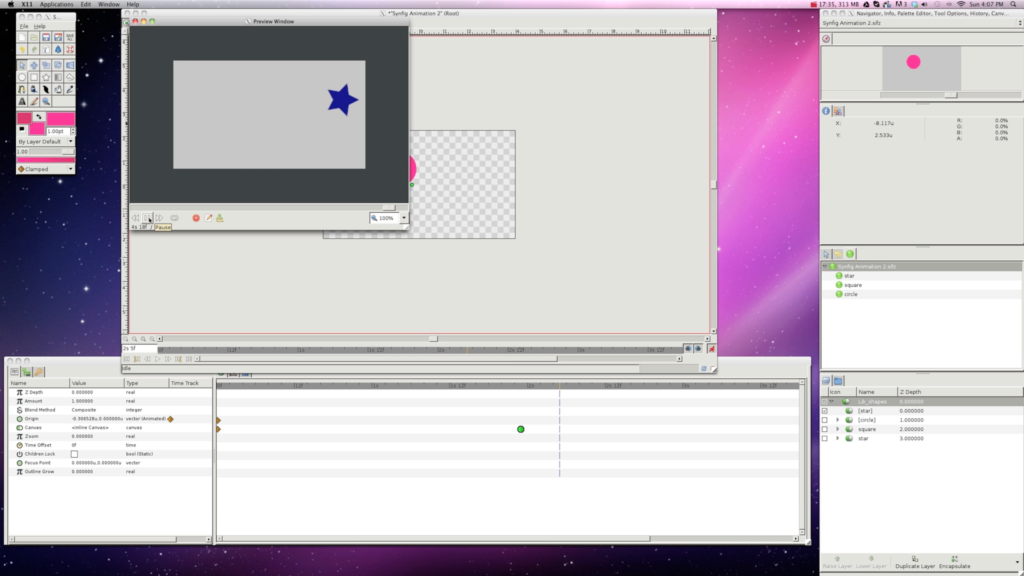
1. Create three different shapes with the shape tools in the tool panel.
I went for the basics using the rectangle, circle and star tool. To make it easy, in the tool options I turned off the outline spline so that the tool only created the fill shape.
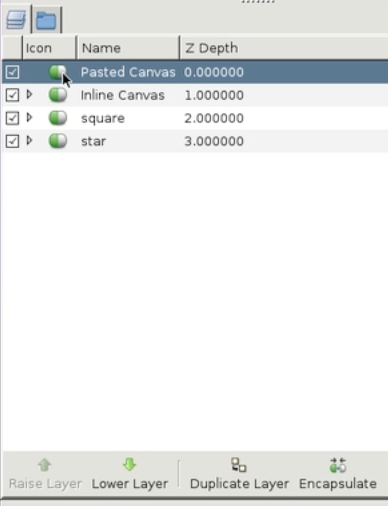
2. Once you create the shapes, encapsulate each of the shapes individually.
To encapsulate the shape, select the fill object layer, like ‘star’, and at the bottom of the Layers Panel, click the icon that looks like a pill. Encapsulate does exactly what it says, placing the object layer in a paste canvas. If you are familiar with Adobe Photoshop, it’s like placing layers from the Layers Palette into a group-layer folder. The terminology in Synfig takes a little getting used to, but when you get it, working will go a lot smoother.
Name each of the encapsulated paste canvases. For the video I showed what happens when you leave the encapsulated paste canvas it’s default name. Basically, when you export the canvas to the library it renames the canvas whatever name you used for the export. Check out the video to see what I mean.
3. Create a blank paste canvas.
Your blank paste canvas is used to make the switches between your shape elements that you export to your library. To create a blank paste canvas on Linux you can right click on the Layers Panel and select ‘New Layer>Other>Paste Canvas.’ On the Mac I needed to go to the layers menu under ‘File’ located in the Tool Panel.
4. Select all four paste canvas layers and encapsulate them.
You can name the encapsulated layer that houses all the other paste canvases something that makes sense. I named mine ‘Lib_shapes.’
5. Export your shape canvases to the library
Select each paste canvas separately that houses your shape object in the layers panel. I could start by selecting the ‘square’ paste canvas. Once selected, go to the Params Panel and right click on ‘<Inline Canvas>’ to the right of where it says ‘Canvas’ on the Params Panel. When you right click and select ‘Export’, you’ll get a small dialogue box where you can name your library canvas. Name it something that makes sense. If I had the ‘square’ layer selected, I would name the export ‘square’. Repeat these steps for the other two shapes.
6. Check out the Library Panel to see what’s happening
You’ll notice in the panel is a green dot with the name of the file that you’re working on. Once you start exporting library element, a carrot appears to the left of the file name element in the Library Panel. If you click on that carrot, you’ll see the elements that you are exporting are inside.
7. Start dropping library elements into your animation
Now with your shape canvases properly exported to the library, you’re ready to start dropping them into your timeline. To toggle over to the animate portion of the program, there is a button of a little green man in the Stage Panel. When you press it, the program is ready to animate. The green man will turn red and take a running pose from his standing position. You’ll also notice a red outline around the stage that flashes. When you’re in the animate mode, anything you change will create a keyframe passed on what parameter you changed.
Turn off the shape canvases in the Layers Panel by clicking the check mark to the left of the layer name. These no longer need to be visible.
Select the blank paste canvas layer that you created at the beginning. This is where you’ll be placing the library elements. You can move anywhere on the timeline located under the stage in the Stage Panel. Once settled on a place in the timeline, click on the Canvas Value in the Params Panel. Select other and type in the name of the library element that you want, like ‘star’. Move to another place on the timeline and click on the Canvas Value again. Select the shape that you want.
8. Select the main paste canvas (‘Lib_shapes’) in order to see the keyframes created.
And that’s it. I hope this helps people who are trying to learning this software out.
