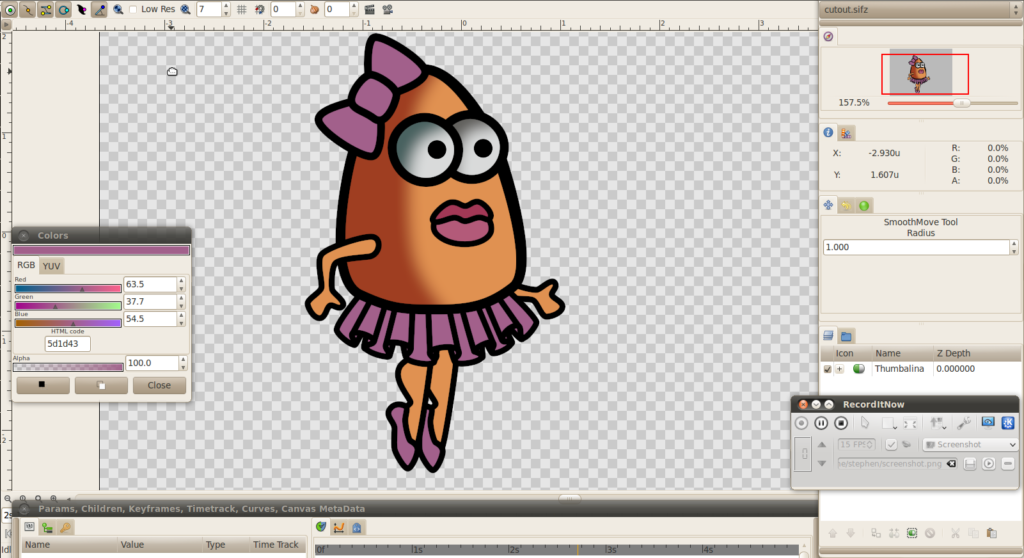
I compiled these notes from the cut-out tutorial on the tutorial page for Synfig. They use an imported png images in order to create a character. Personally, I think it’s smarter to create a vector character from Synfig so that it’s resolution independent. Synfig is also able to import vector files from programs like Inkscape or Illustrator. Quadro Chave has created a great vimeo video that will take you through the process of preparing vector files to import into Synfig. I believe that their video was created before Synfig could import vector files. There should be no need to export the layers as PNGs and then trace in Synfig:)
I created Thumbalina to make it easy to understand what was going on with my file without it being so complex. I hope this helps.
Step 1: Draw Your Character
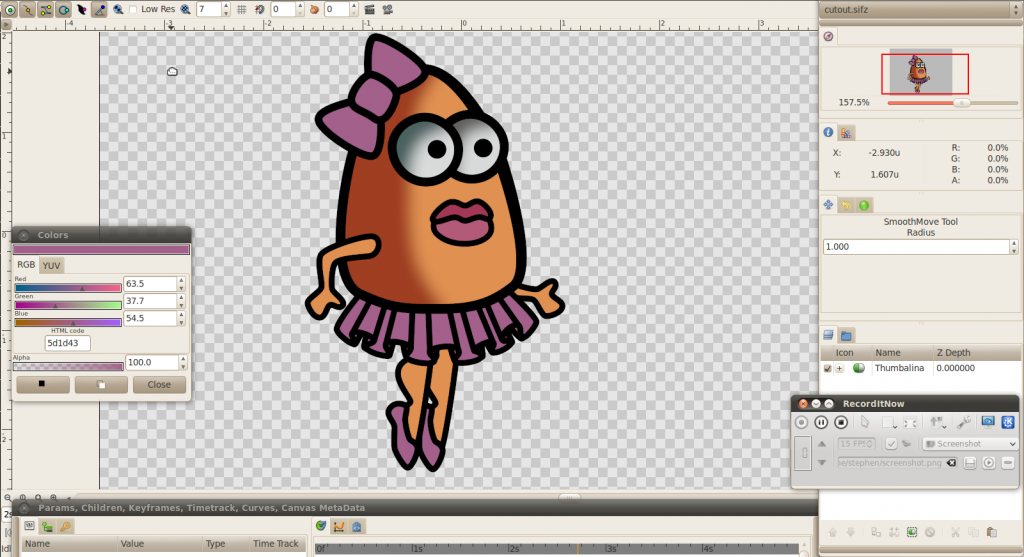
Draw your character. I like using Synfig to draw. It has a lot of potential and power. You’ll have tons of layers when you’re done. While you draw, make sure you properly name your layers. Synfig creates a layer for each fill or outline. All the layers can add up over time. So make sure that you have a handle on your layers. Remember, a clean house is an efficient one:)
Step 2: Encapsulate Your Layers by Using Paste Canvas Layers
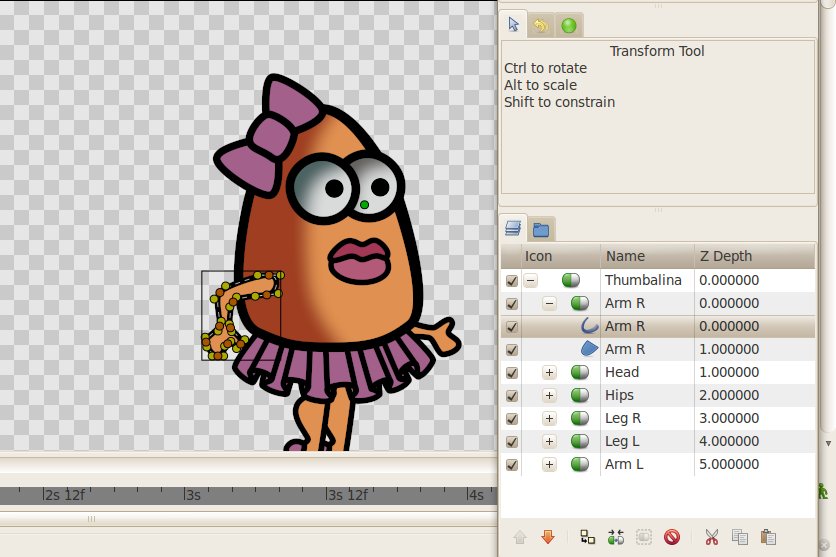
Sometimes terminology can be difficult to grasp while learning programs. Here is one of those situations. For the next step you’ll be placing or “encapsulating” your layers into folders in the layers panel. This is a way of organizing and controlling your character. In the tutorials the manual refers to these encapsulated folders as ‘Paste Canvas layers’.
The easiest way to created a Paste Canvas layer is to select the layers that you want to encapsulate and then press the encapsulate button (green and white pill-like icon) at the bottom of the layers panel. After you click the encapsulate icon, you’ll have a Paste Canvas layer with a generic name of ‘Inline Canvas’ layer and the layer contents inside. Make sure you name the paste layer something that makes. Naming all layers will ensure success or at least prevent confusion.
Important Note: Make sure that if you need to move a body part into a better position not to move a paste layer. Move the object layers instead. If you move the paste layer around on the canvas, it will make your rotation layers not line up. Trust me. I learned the hard way:)
Step 3: Add Rotation Layer
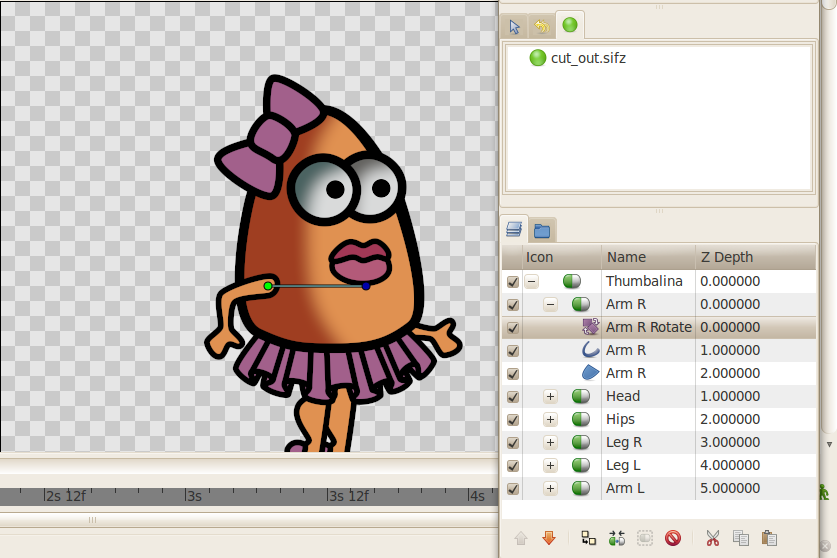
Now that all the layers are separated into their respective Paste Canvas layers, you’ll next be adding a rotation layer for each paste layer. Start by opening your topmost paste layer. Right click on the top layer in the paste layer and select NEW LAYER>TRANSFORM>ROTATE LAYER. Doing that will add a rotate layer in your Paste Canvas layer. Name the rotate layer the same name as what you named the paste layer. You’ll need to do that so that you can tell the difference when you start adding your rotation layer hierarchy later. While you still have the rotation layer highlighted, select the origin of rotation (it’s a green dot) on the canvas and move it to the the area of the Paste Canvas layer where you want the center point of rotation to be. In the example you’ll see that the origin of rotation for the ‘Arm_R’ rotation layer was moved to the shoulder so that the arm pivots around the shoulder. The rotation layer only affects what’s encapsulated in the paste layer until you create your hierarchy.
Step 4: Export Rotation Layer
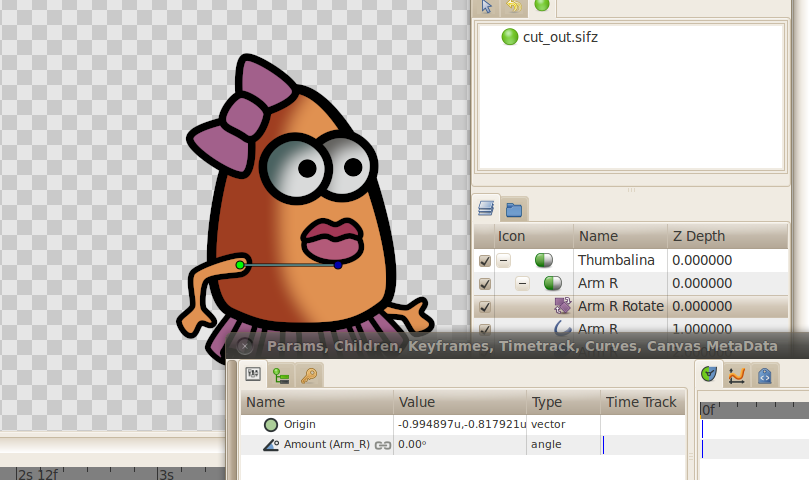
Now here is the cool but tricky part. While the rotation layer is still selected, we’re going to export the rotation info so that we’ll be able to create a hierarchy. Again, make sure the rotation layer is selected and go to the params panel. Right click over ‘rotation’ and select EXPORT. When you do, a dialogue box will pop up and ask you to name your rotation. Give it the same name as your paste layer to easily keep track over everything. When you hit ‘okay’, the name will show up next to the word rotation in the params panel. Repeat steps three and four for the rest of your Paste Canvas layers. When you have all the rotation layers and export completed, you’re ready to build your hierarchy.
Step 5: Building a Hierarchy
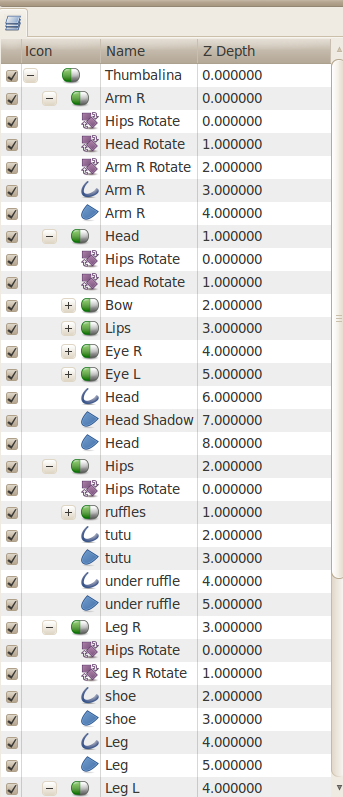
As stated in the Synfig tutorial, your skeletal hierarchy should start at the hips of your character. In Synfig, you created parent/child relationships by pasting the parent info in the child’s Paste Canvas layer. The hips layer is the top cheese of the hierarchy and all the other Paste Canvas layers are children. Therefore, if you copy the rotation layer for the hips and paste it in all the other Paste Canvas layers, you will start to create a parent child relationship. Once you do that, you can move the hips rotation and all the other body part will respond.
There are added relationships that you need to develop. For Thumbalina, the hips are connected to the head which are connected to the arms. If I want to move the head without the hips, I still want to make the arms move. Here is how the rotation layers will be situated to make the parent/child hierarchy work.
1. Arm R Paste Layer>Head Rotation Layer/Hips Rotation Layer/Arm R Rotation Layer
2. Head Paste Layer>Hips Rotation Layer/Head Rotation Layer
3. Leg R Paste Layer>Hips Rotation Layer/Leg R Rotation Layer
4. Leg L Paste Layer>Hips Rotation Layer/Leg L Rotation Layer
5. Arm L Paste Layer>Head Rotation Layer/Hips Rotation Layer/Arm L Rotation Layer
Conclusion
That’s it. You’re done with creating your character and you’re ready make your first animation.
Hi there!
I have following your blog for about a year – roughly the amount of time I have been dabbling in Synfig.
2 questions:
1:Why copy the transform layer into the nested encapsulated layers? If the encapsulated layer is inside its parent layer and it has a rotation layer. then it will automatically inherit that anyway.
2: have you ever seen synfig not write out data for transform layers? I have a very simple character that has two arms set up the same. one arm remembers all the animation applied to it, thoe other arm doesnt.
regards
Dave Hingley
Hey there Dave! I was just thinking this morning that I need to get back to Synfig. I miss it.
You have two great questions. First, You are correct about the redundancy in my old files. As my character were getting more complex, I started having errors and glitches. People on the forum helped me clear up any issues—including overlap with multiple rotations. I have a cleaner version that I can share if you are interested.
As for your second question, do you want the two arms to move together with identical movement, or do you have one that works with your rig and the other one does not? My friend Mike, who’s a programmer, is really good at exporting functions and linking one movement to another in Synfig. It’s still witchcraft to me:) If you have a “broken arm”, it could be an easy fix that you’re overlooking. Either way, if you want to send the file to me, Mike and I can take a crack at it. Let me know if that sounds good!